

-
-
-
-
Strength

-
About Us


How to repair wooden floors
Release time:
2023-11-22
Author:
Source:
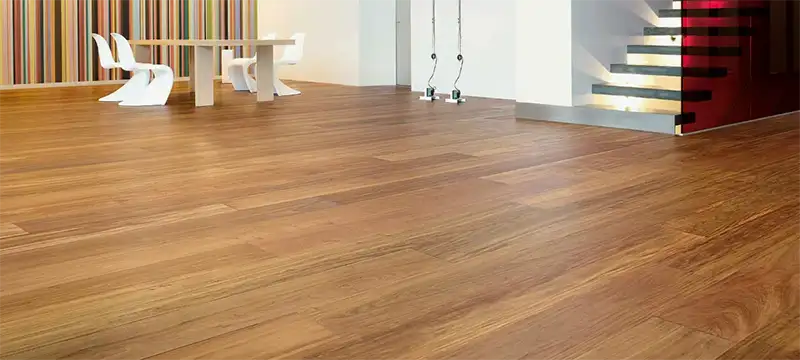
In home life, wooden flooring is a common decorative material for many families. Due to factors such as family members walking around, moving furniture, and dropping items during use, the surface of the wooden floor can easily get countless scratches and damages. Additionally, high-temperature objects can cause localized burn marks on the wooden floor.
The wooden floor has scratches and damage, and if you don't want to spend money to hire someone to repair it, you can restore it to like new in just 12 steps.
In home life, wooden floors are a common flooring material for many families. Due to factors such as family movement, furniture relocation, and items falling, the surface of the wooden floor can accumulate countless scratches and damage. Additionally, high-temperature items can cause localized burns on the wooden floor. So, when faced with various quality issues on the surface of the wooden floor, how should we repair it? This article will first analyze the common human-caused damage quality issues of wooden floors in detail, and then provide a standard 12-step repair process to help you understand the professional knowledge of wooden floor repair.
Surface quality issues caused by human factors during the use of wooden floors.
1. Surface scratches: Scratches on the surface of wooden floors are the most common quality issue caused by human activity after use. This situation is mostly caused by moving furniture and items. Once deeper scratches occur, if one does not know how to repair them, it is often impossible to make the scratches disappear.
2. Surface damage: Wooden floors often suffer from burns due to high temperatures during use, such as when a cigarette butt accidentally falls on the floor or when appliances generate high temperatures that damage the surface of the wooden floor.
3. Surface insect damage: Since wooden floors are made of wood, there is a certain probability of insect damage. Additionally, if the wooden floor is exposed to moisture for a long time due to the living environment, it can accelerate the occurrence of insect damage. When insect damage occurs, holes will appear on the wooden floor, compromising the integrity of the surface.
4. Discoloration and mold: If there is water leakage or a long-term humid environment in home life, the wooden floor may develop discoloration and mold, especially mold, which significantly affects the surface. Over time, this can lead to the rotting of the wooden floor.
5. Surface cracking: Wooden floors have a certain moisture content, but prolonged exposure to sunlight can lead to long-term dryness, causing the wooden floor to deform and bulge, resulting in cracks on the surface, directly affecting its aesthetics.
In the face of the above five types of scratches and damage on the wooden floor surface, it is necessary to carry out repairs to restore its original integrity, ensuring that the overall aesthetics are not affected. So, how should such repairs be done? Next, I will share the standard 12 steps for repairing scratches and damage on wooden floors, providing professional knowledge on wooden floor repair.
Detailed explanation of the standard steps for repairing scratches and damage on wooden floors.
Step 1: Prepare wooden floor repair materials and tools.
To repair scratches and damage on the wooden floor surface, the first step is to prepare the materials and tools, which is a basic preparation and a prerequisite for the repair.
Repair tools: 2-3 disposable plastic cups, 2 small metal spatulas, several fine-grit sandpapers, a hairdryer, 2-3 towels, a box of utility knife blades, a small electric sander, 1-2 small scrapers, a vacuum cleaner, several small trash bags, and a spray paint pump. Repair materials: several repair putties, repair hardeners, repair paints, and base materials for repair paste (gray, white, red, beige, etc.). Step 2: Clean the debris and dust from the scratched and damaged areas of the wooden floor.
Cleaning the debris and dust from the scratched and damaged areas of the wooden floor can be divided into two small steps, as follows:
Cleaning the debris from the scratched and damaged areas of the wooden floor: First, use tools to clean the debris from the damaged areas of the wooden floor, ensuring that there is no debris left, which is essential for the quality of the repair. Otherwise, it will only be a superficial repair, and various problems will arise again in a few days.
Cleaning the dust from the scratched and damaged areas of the wooden floor: After cleaning the debris from the damaged areas, it is necessary to clean all the dust around the area that needs repair, ensuring that the wooden floor is in a dust-free environment during the repair. Otherwise, dust adhering to the repair materials during the process will affect the quality of the repair and the adhesion of the repair materials to the wooden floor. Only by cleaning the dust from the surface of the repair area can we ensure the firmness and completeness of the adhesion between the repair materials and the wooden floor.
Step 3: Protect the repair area.
Now that the debris and dust from the scratched and damaged areas of the wooden floor have been cleaned, the next step is to protect the repair area to ensure that the repair does not affect other intact wooden floors.
Typically, the protection of the repair area involves using colored paper to paste old newspapers onto the wooden floor, exposing the area that needs repair, and then covering the surrounding area with old newspapers. This way, all tools and materials can be placed here without affecting the integrity of the surrounding floor surface during the repair.
Step 4: Sand the surface of the wooden floor that needs repair.
Now that the surface of the wooden floor has been properly protected, the next step is to sand the wooden floor. Using sanding tools and sandpaper, sand down the uneven areas of the wooden floor, and then clean up all the dust generated from the sanding.
Step 5: Prepare the base material for the repair paste.
Adjust the base material for the repair paste according to the original color of the wooden floor to achieve the closest color match. When adjusting the base material for the repair paste, do not rush; adjust it bit by bit. Do not add the hardener until the color is close to that of the wooden floor, so you don't have to worry about the repair paste curing too quickly. You can adjust it carefully and then add the hardener evenly for use.
Step 6: Level the repair area on the wooden floor.
Use a small scraper to apply the prepared repair paste to the area of the wooden floor that needs repair, then scrape the surface flat, ensuring that the repair paste is slightly higher than the surface of the wooden floor, but not too much, as the repair paste will automatically shrink after drying. If too much repair paste is applied, it will be cumbersome to sand later, but it must not be lower than the wooden floor.
Step 7: Dry the repair paste
Since the repair paste is applied to the surface of the wooden floor, the drying process will be slow due to its thickness, so a hairdryer should be used to dry it quickly and thoroughly. During the drying process with the hairdryer, be careful not to keep the hairdryer on continuously; use it for 5-10 minutes and then let it rest for a while to cool down. This will ensure that the hairdryer does not burn out due to high temperatures at the connection.
Step 8: Sand the repair paste
Once the repair paste is completely dried, you can use sanding equipment and sandpaper to sand the repair paste, ensuring that it is level with the wooden floor and feels smooth to the touch, with no deep scratches from the sandpaper on the surface of the repair paste.
Step 9: Prepare the primer
Now that the surface of the wooden floor is smooth and level, you can proceed to adjust the primer. Adjusting the primer is the most challenging part, so here is a detailed method for adjustment.
First, understand how to mix the primer, as different color combinations will produce a new color. Therefore, you need to know what new color will result from mixing different paint colors. Then, use a small cup to add the base paint, followed by the base paint needed to create the new color. Add it slowly, bit by bit, and mix multiple times; do not expect to achieve the right color in one go, as this is very difficult even for professionals. Also, do not add a hardener during the adjustment; only add it once you have mixed to the closest color.
Topcoat color chart
Step 10: Apply the primer
Pour the adjusted primer into the spray gun of the air pump, then spray it onto the sanded area of the wooden floor. When spraying, make sure to apply multiple coats; do not spray the primer continuously on the wooden floor. After each spray, let it dry for about 10 minutes to ensure the surface dries slightly, which will prevent drips and ensure a smooth and even finish.
Step 11: Apply the texture
Once the topcoat is dry, create new textures on the repair to match the existing textures on the floor. The method for applying texture is similar to mixing the topcoat; after mixing the texture color, use a small brush to paint the texture onto the topcoat according to the texture lines on the floor.
Step 12: Apply the topcoat
After the texture on the primer dries, you can spray a clear topcoat over it for protection. Typically, the topcoat should be applied in no less than three coats, and the application should also be done in multiple sessions to ensure the gloss and smoothness of the surface.
By following the above 12 steps, you can repair scratches and damaged areas on the wooden floor, restoring its integrity. However, many may find that mixing repair paste, adjusting primer, spraying primer, applying texture, and applying topcoat are too professional and difficult to operate. So, let's discuss how to easily achieve these professional repair details at home.
Mixing repair paste: If you are doing the repair yourself, you may not be able to prepare as many repair materials as professional repair personnel. Therefore, you can buy ready-made universal repair paste from a paint store or online. If you find that the color difference in universal repair paste is significant, you can take a picture of your wooden floor and send it to the seller to help you mix the base paste. Then, you can add the hardener at home, making it ready for use and closely matching the color of the wooden floor. Mixing primer: Since the amount used for repairs is very small, it is not suitable to buy a whole bucket of paint from a physical store. Instead, you can directly purchase ready-made repair paint, which comes in many colors and can meet the current variety of wooden floor colors on the market. This type of ready-made primer is also designed as spray paint, allowing you to spray it directly onto the wooden floor at home. Applying texture: While applying texture may seem very professional, you will find that since the area needing repair on the wooden floor is small, you only need to simply draw the texture based on the original texture of the wooden floor. This way, you can create new textures on the wooden floor that are hardly noticeable as being added later. This is mainly because the texture of the wooden floor itself is irregular, so there is no need to worry; even without professional skills, you can create textures. Applying topcoat: For the topcoat, it is best to use a small air pump to spray the paint. However, if you are doing the repair yourself, this may be difficult to achieve, and you shouldn't have to buy a small air pump just to repair scratches on the wooden floor. Therefore, you can purchase ready-made hand spray topcoat, allowing you to do the topcoat spraying repair yourself.
Summary
To remedy scratches and damage on wooden floors, simply follow the 12 steps above to restore the wooden floor to its original integrity. You can also complete this repair work at home, as the difficulties in the repair process have been addressed.
Previous
Yucheng Haosheng Decoration Materials Co., Ltd.
Address: Xicheng Economic Industrial Park, Yucheng City, Shandong Province
Hotline:+86-5342123058
WhatsApp:8613475156238
Email:bosifloor@163.com
